In an e-commerce ecosystem powered by WooCommerce, managing customer interactions can be a challenge. One solution is WP Fusion, a powerful WordPress plugin that allows you to connect your WooCommerce store to any one of a host of leading CRM and marketing automation systems. WP Fusion’s strength lies in its ability to tag users based on their actions, allowing for precise and efficient customer segmentation and targeted follow-ups.
Whether you’re sending a welcome email, notifying a customer of a successful purchase, providing details about refunds, or sending reminders about failed transactions, WP Fusion is a reliable partner that helps automate your marketing processes and boost your store’s overall performance.
Setary brings this power to your fingertips, with a feature that enables you to bulk edit WP Fusion tags for WooCommerce product tags. This streamlines the process and makes your workflow that much smoother.
This guide provides step-by-step instructions on how to use Setary’s spreadsheet editor to bulk edit WP Fusion tags for WooCommerce product tags. This feature comes in handy when you want to manage customer interactions and responses to various product states like purchased, refunded, or failed transactions.
To make this possible, Setary provides three specific columns:
- WP Fusion Apply Tags: This applies tags to the customer when a product or variation is purchased.
- WP Fusion Apply Tags Refunded: These tags are applied to the customer when a product is refunded. Note that this does not apply to product variations.
- WP Fusion Apply Tags Failed: These tags get applied when an order fails, which is also not applicable to product variations.
By bulk editing these tags, you can automate and efficiently manage your customer interactions based on their engagement with your WooCommerce store.
Enabling WP Fusion for Setary Requests
- Log into your WooCommerce store. Start by logging into your WooCommerce admin area.
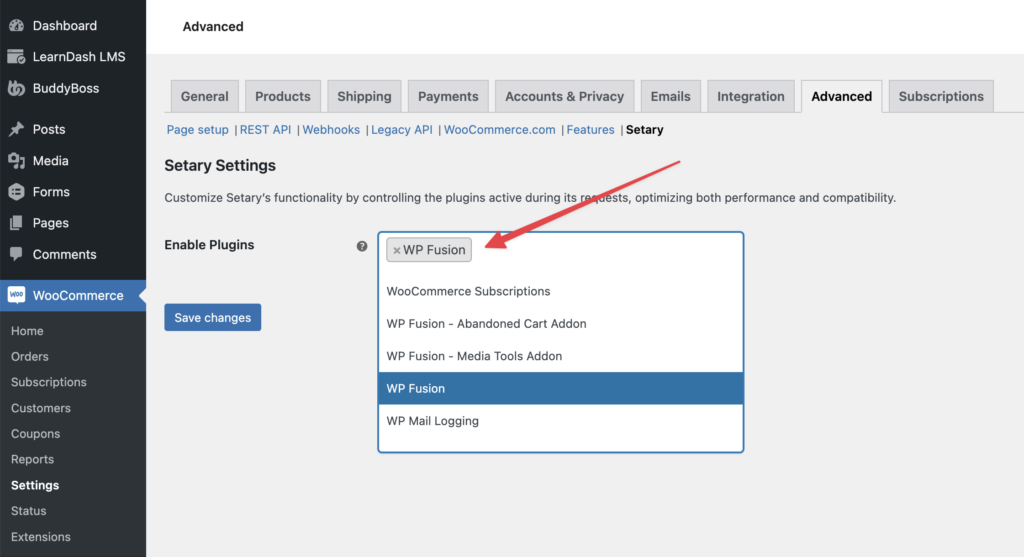
- Navigate to Setary settings. On your WordPress dashboard menu, select WooCommerce, then Settings, and then the Advanced tab. You’ll find Setary listed there.
- Enable WP Fusion. In the Setary settings, you’ll notice a product search field. Type “WP Fusion” into it and select it from the dropdown menu.
- Save your settings. After selecting WP Fusion, remember to save your settings. This activates WP Fusion during Setary’s requests.
Loading WP Fusion Columns in the Spreadsheet
- Go to the Setary app and open the Products tab.
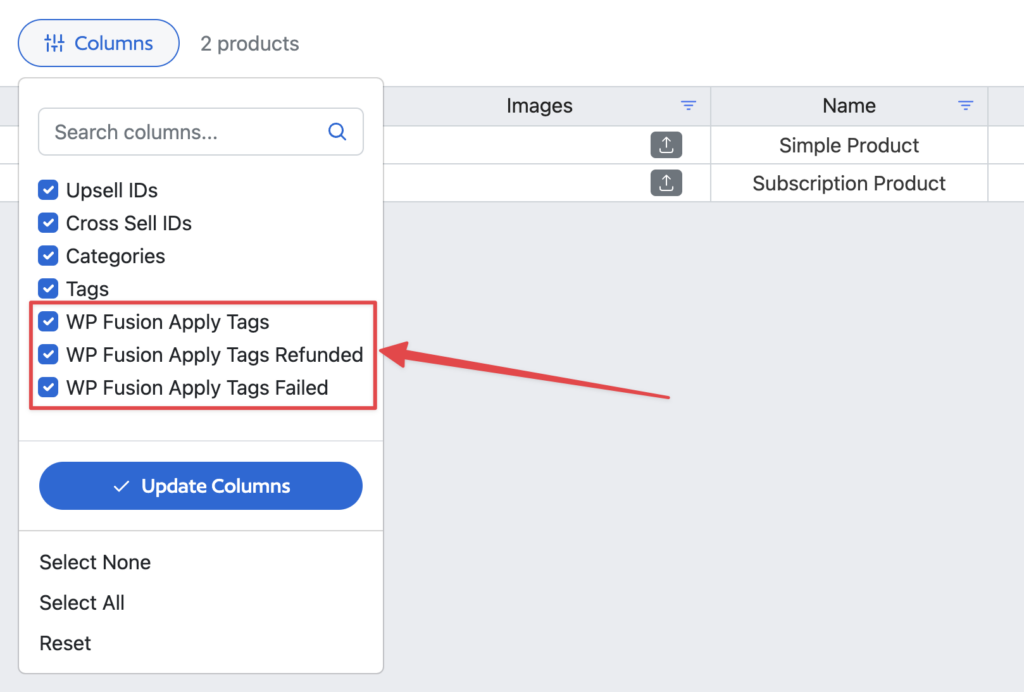
- Click the Columns dropdown. You will see a list of columns that can be enabled or disabled.
- Enable the WP Fusion columns. Locate the WP Fusion columns listed above and check their boxes to enable them.
- Save Columns. Click Save Columns to update your spreadsheet. The WP Fusion columns are now ready to use.
Editing the Data
- Locate the WP Fusion columns in your spreadsheet. Scroll sideways in your spreadsheet to find the newly added WP Fusion columns.
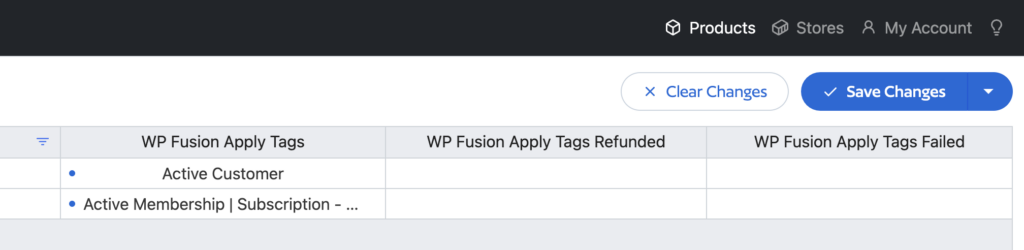
- Select a cell to edit. Double click on the cell in the WP Fusion column for the product you want to edit. For example, if you want to apply specific tags when a product is purchased, choose a cell in the WP Fusion Apply Tags column.
- Choose the tags to apply. A dropdown will appear listing all available tags. Choose the tags you want to apply to the product.
- Confirm your edit. Click anywhere outside of the cell to confirm the changes. The new data is now ready to be saved.
- Save Changes. Click the Save Changes button to apply your edits to your live site.
And there you have it! You’ve just learned how to bulk edit WP Fusion tags for WooCommerce products using Setary. This efficient tool allows you to automate and manage customer interactions based on different product states.