This guide will show you how to connect your WooCommerce store to Setary using manual API keys.
- Go to the Setary app.
- Click “Stores” in the app navigation.
- Click “Add Store”.
- Follow the steps below.
Step One: Install the Setary Helper Plugin
- Download the Setary Helper plugin.
What’s this? This is a lightweight helper plugin that enhances the WooCommerce endpoints, making it easier for Setary to pull products from your store and update them in a performant way. - Install the Setary Helper plugin on your store:
- Login to your WordPress admin area.
- Navigate to Plugins > Add New.
- Upload the plugin zip.
- Click Activate.
Step Two: Create API keys
- Go to WooCommerce
- Click WooCommerce > Settings > Advanced > Rest API
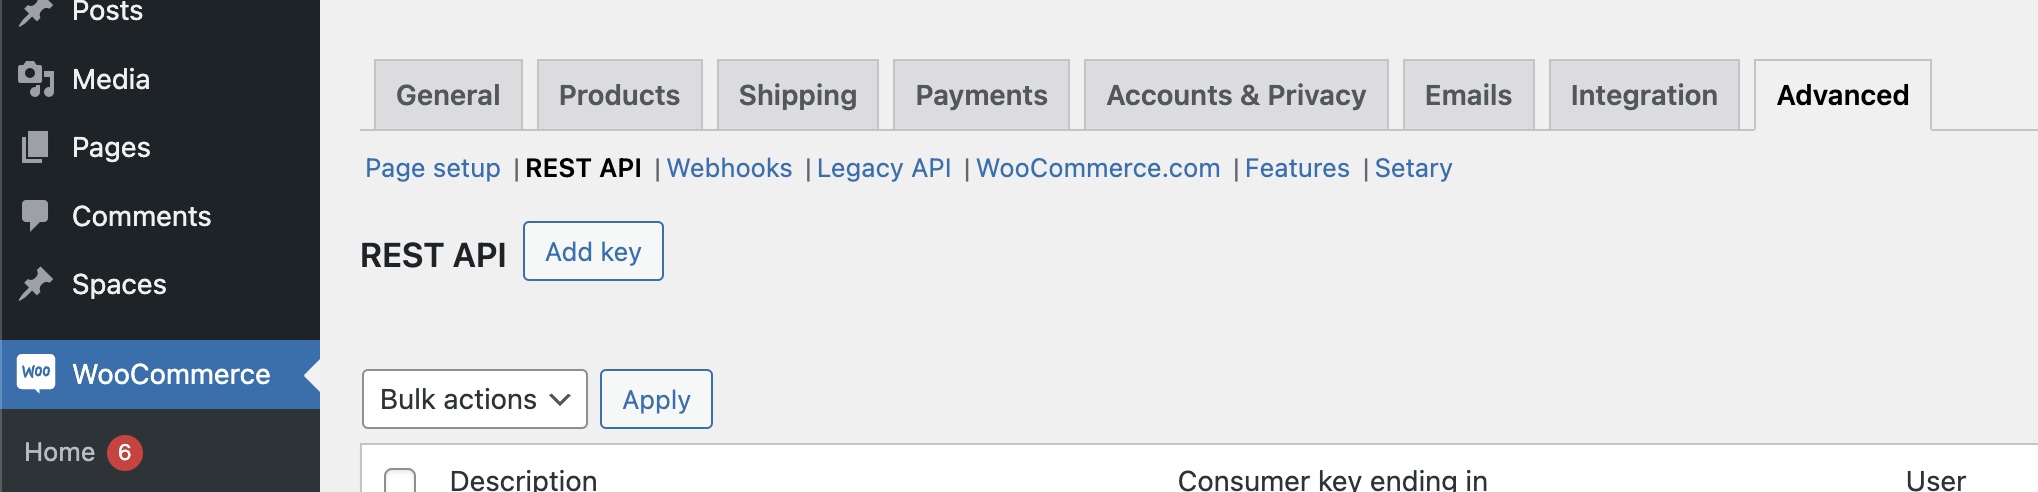
- Click Add Key
- Set the name to Setary or anything you want.
- Change permisions to read/write
- Click generate, and these 2 keys are those than need to be inputted for step 3.
Step Three: Connect Your Store
- Navigate back to the Setary App.
- Click Stores from the main navigation.
- Click Add Store.
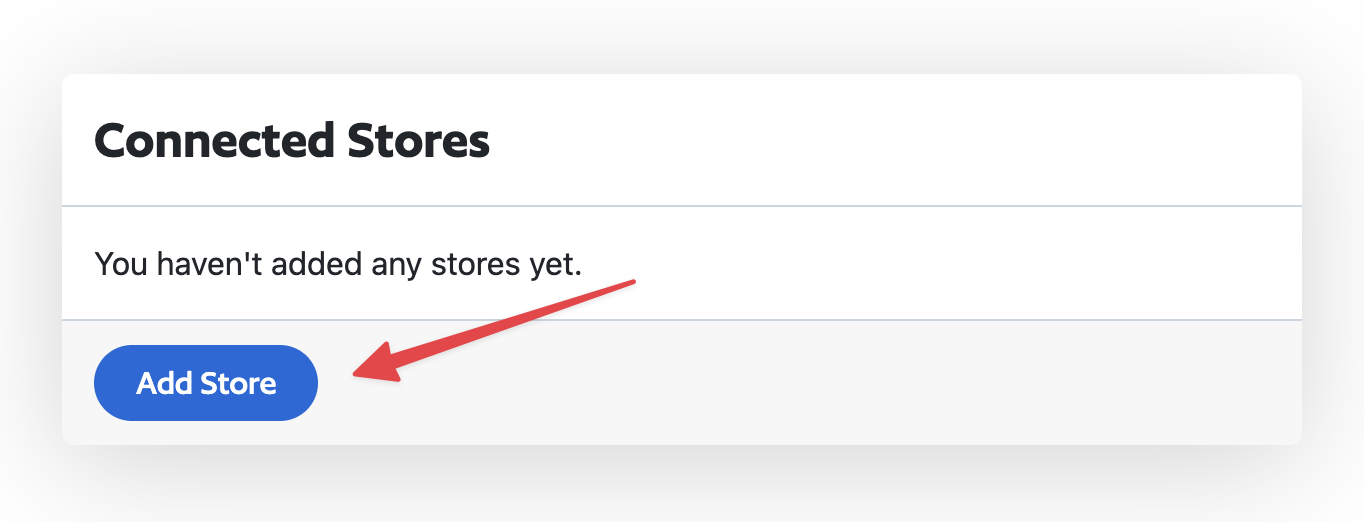
- Enter the URL of your store into the Store URL field.
- Click or add keys manually
- Enter the keys from step 2.