
To use Setary to edit meta data for your WordPress posts, pages, custom post types, or WooCommerce products, follow these steps:
Shopify note: The same process applies to Shopify metafields. As with WooCommerce custom fields, you type the metafield key into the column header yourself, and Setary edits the value as a plain text field.
- Open the Setary spreadsheet editor and use the tabs at the bottom to navigate to the content type that you want to manage metadata for.
- In the top toolbar, click the Columns button.
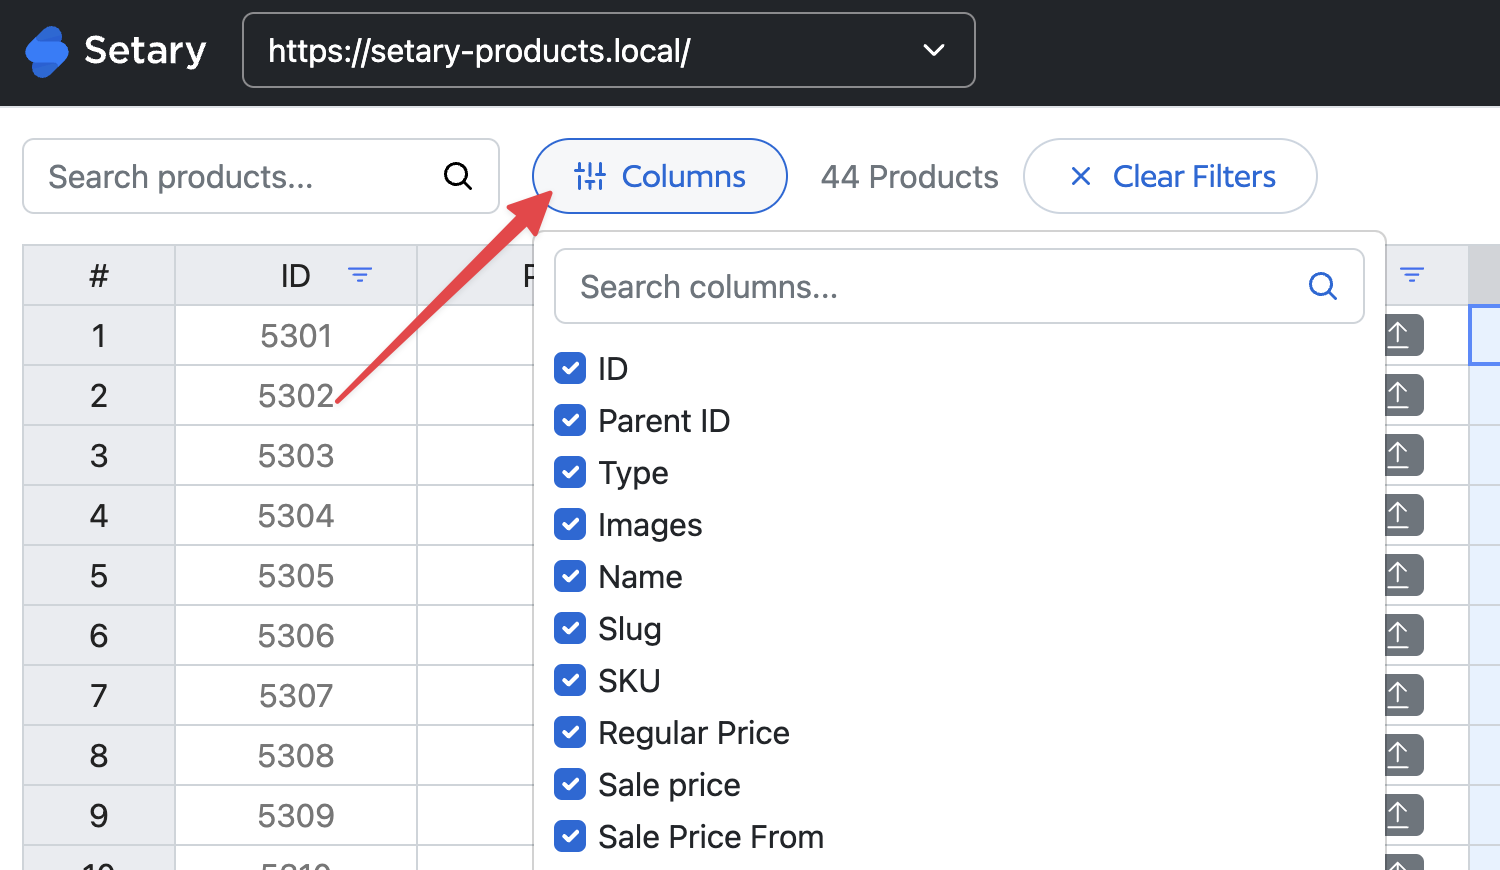
- In the Columns menu, check the boxes next to any meta data columns that you want to show in the list.
- Click the Update Columns button to apply the changes.
- Scroll to the meta data columns in the list.
- To edit the meta data for a particular item, simply click on the cell that contains the data and enter your new value.
Keep in mind that meta data is always displayed as a text field in Setary, and there is no validation for the data that you enter. It is up to you to ensure that the data you enter is correct and in the correct format.
Once you have finished editing the meta data, be sure to save your changes by clicking the Save Changes button in the top toolbar. This will update the metadata in your store with your new values.