
This article shows you how to edit Shopify inventory quantities by location in Setary. It applies to connected Shopify stores only. WooCommerce does not have the same stock location setup within one store.
Where Shopify Locations Come From
Shopify locations are managed in the Shopify admin under Settings > Locations. You can create, rename, and delete locations there. Setary shows those existing locations, but it does not create or manage them.
Each Shopify variant has a separate quantity at each location. A location might be a warehouse, a shop, or a third party fulfillment center.
If you still need to connect your store, use this guide: Connect a Shopify store.
Show the Location Columns
The location columns do not appear automatically in the spreadsheet. You need to choose which ones you want to see:
- Click the Columns button in the top toolbar.
- Tick each Shopify location you want to show in the spreadsheet.
Each location column will appear named “Inventory” followed by the location name in brackets. For example, you might see Inventory (Toronto Warehouse) or Inventory (Vancouver Store).
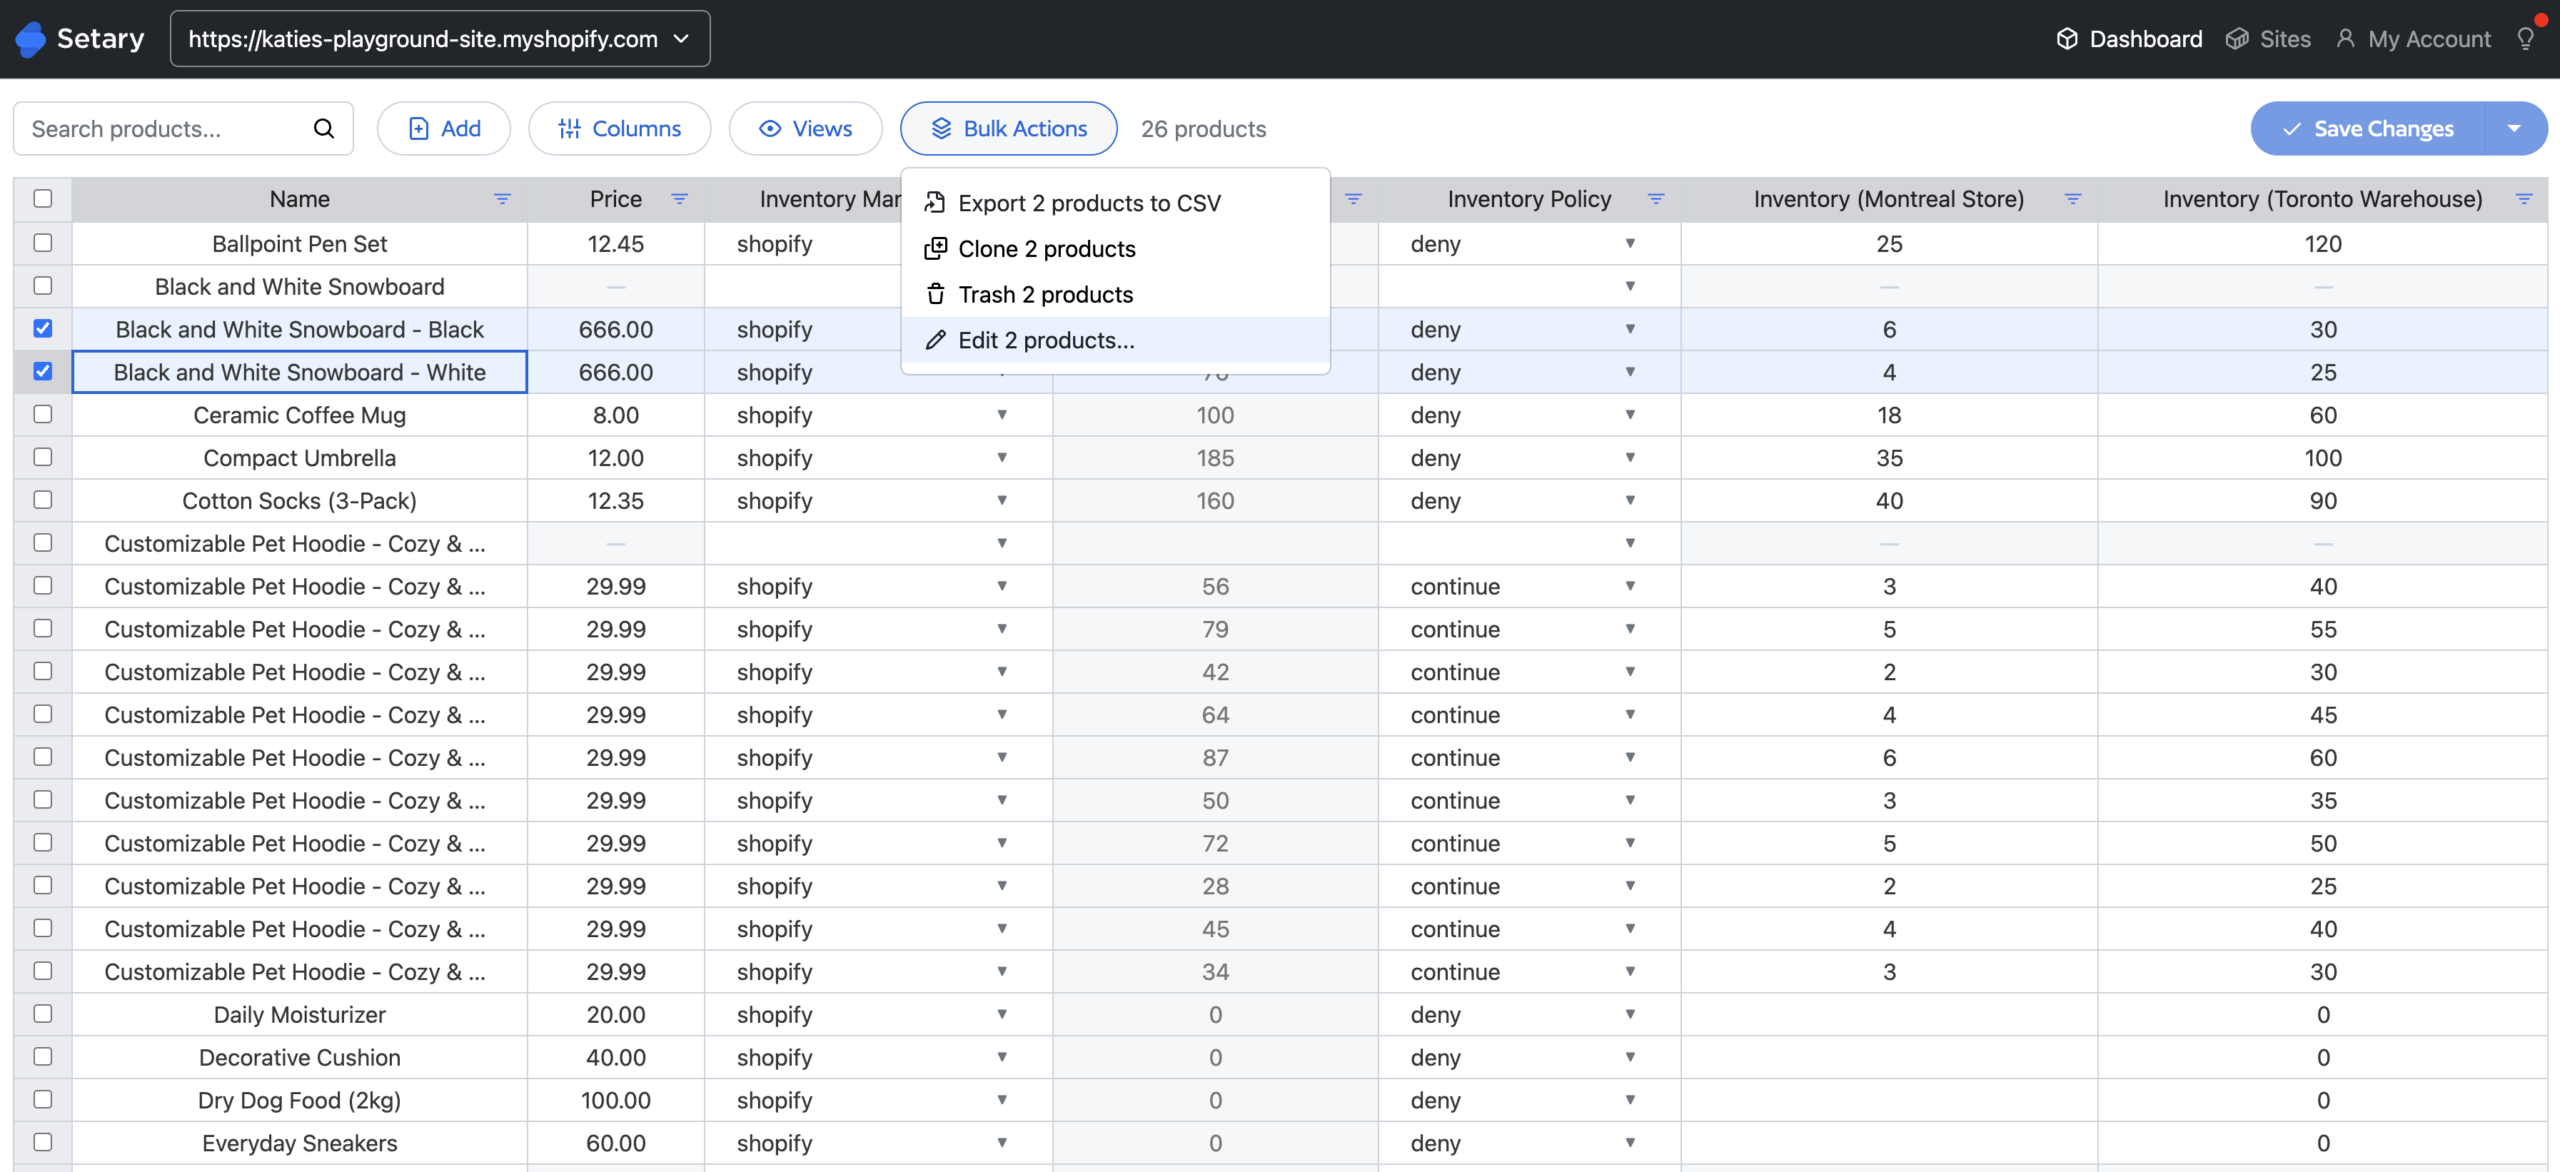
You can show only the locations you need for the current task. If you manage many locations, this keeps the spreadsheet easier to read.
For more detail on column visibility, see this guide: How to show and hide columns in Setary.
Edit the Stock at One Location
- To edit one product or variant, find the correct row in the spreadsheet.
- Find the column for the location you want to update.
- Click into the cell, type the new quantity, and continue editing any other cells you need.
- When you are finished, click Save Changes.
Only edit the location column for the stock you want to change. Do not try to edit the Inventory Quantity total directly, because that value is calculated from the locations.
Why the Inventory Quantity Column is Read Only
You may also see a column named “Inventory Quantity”. When you manage Shopify stock by location, this column is read only.
Inventory Quantity is the calculated total across all your locations. It is not the field you edit when stock is split by location.
To change stock, edit the individual location columns instead. When the location quantities change, the total updates to match.
Bulk Edit Location Stock Across Many Products
You can update the same quantity across many products in a particular location at once. First narrow the spreadsheet to the products you want, then select those rows and apply a bulk edit:
- Use the search box and column filters to narrow the spreadsheet to the products you want to update.
- Select the products with the checkboxes at the left of the spreadsheet. To select all visible rows, use the checkbox in the header row.
- After you select products, a Bulk Actions button appears in the toolbar.
- Click Bulk Actions, then click Edit.
- In the Bulk edit window, open Select field to edit.
- Choose the location column you want to update, such as Inventory (Toronto Warehouse).
- Open Select how to edit field and choose the bulk action you need, such as Set value.
- In Enter value, type the quantity you want to apply to every selected product.
- Click Proceed to apply the edit to the selected rows.
- Repeat the process for each other location you need to update. Choose a different location in Select field to edit each time.
- When all edits are ready, click Save Changes.
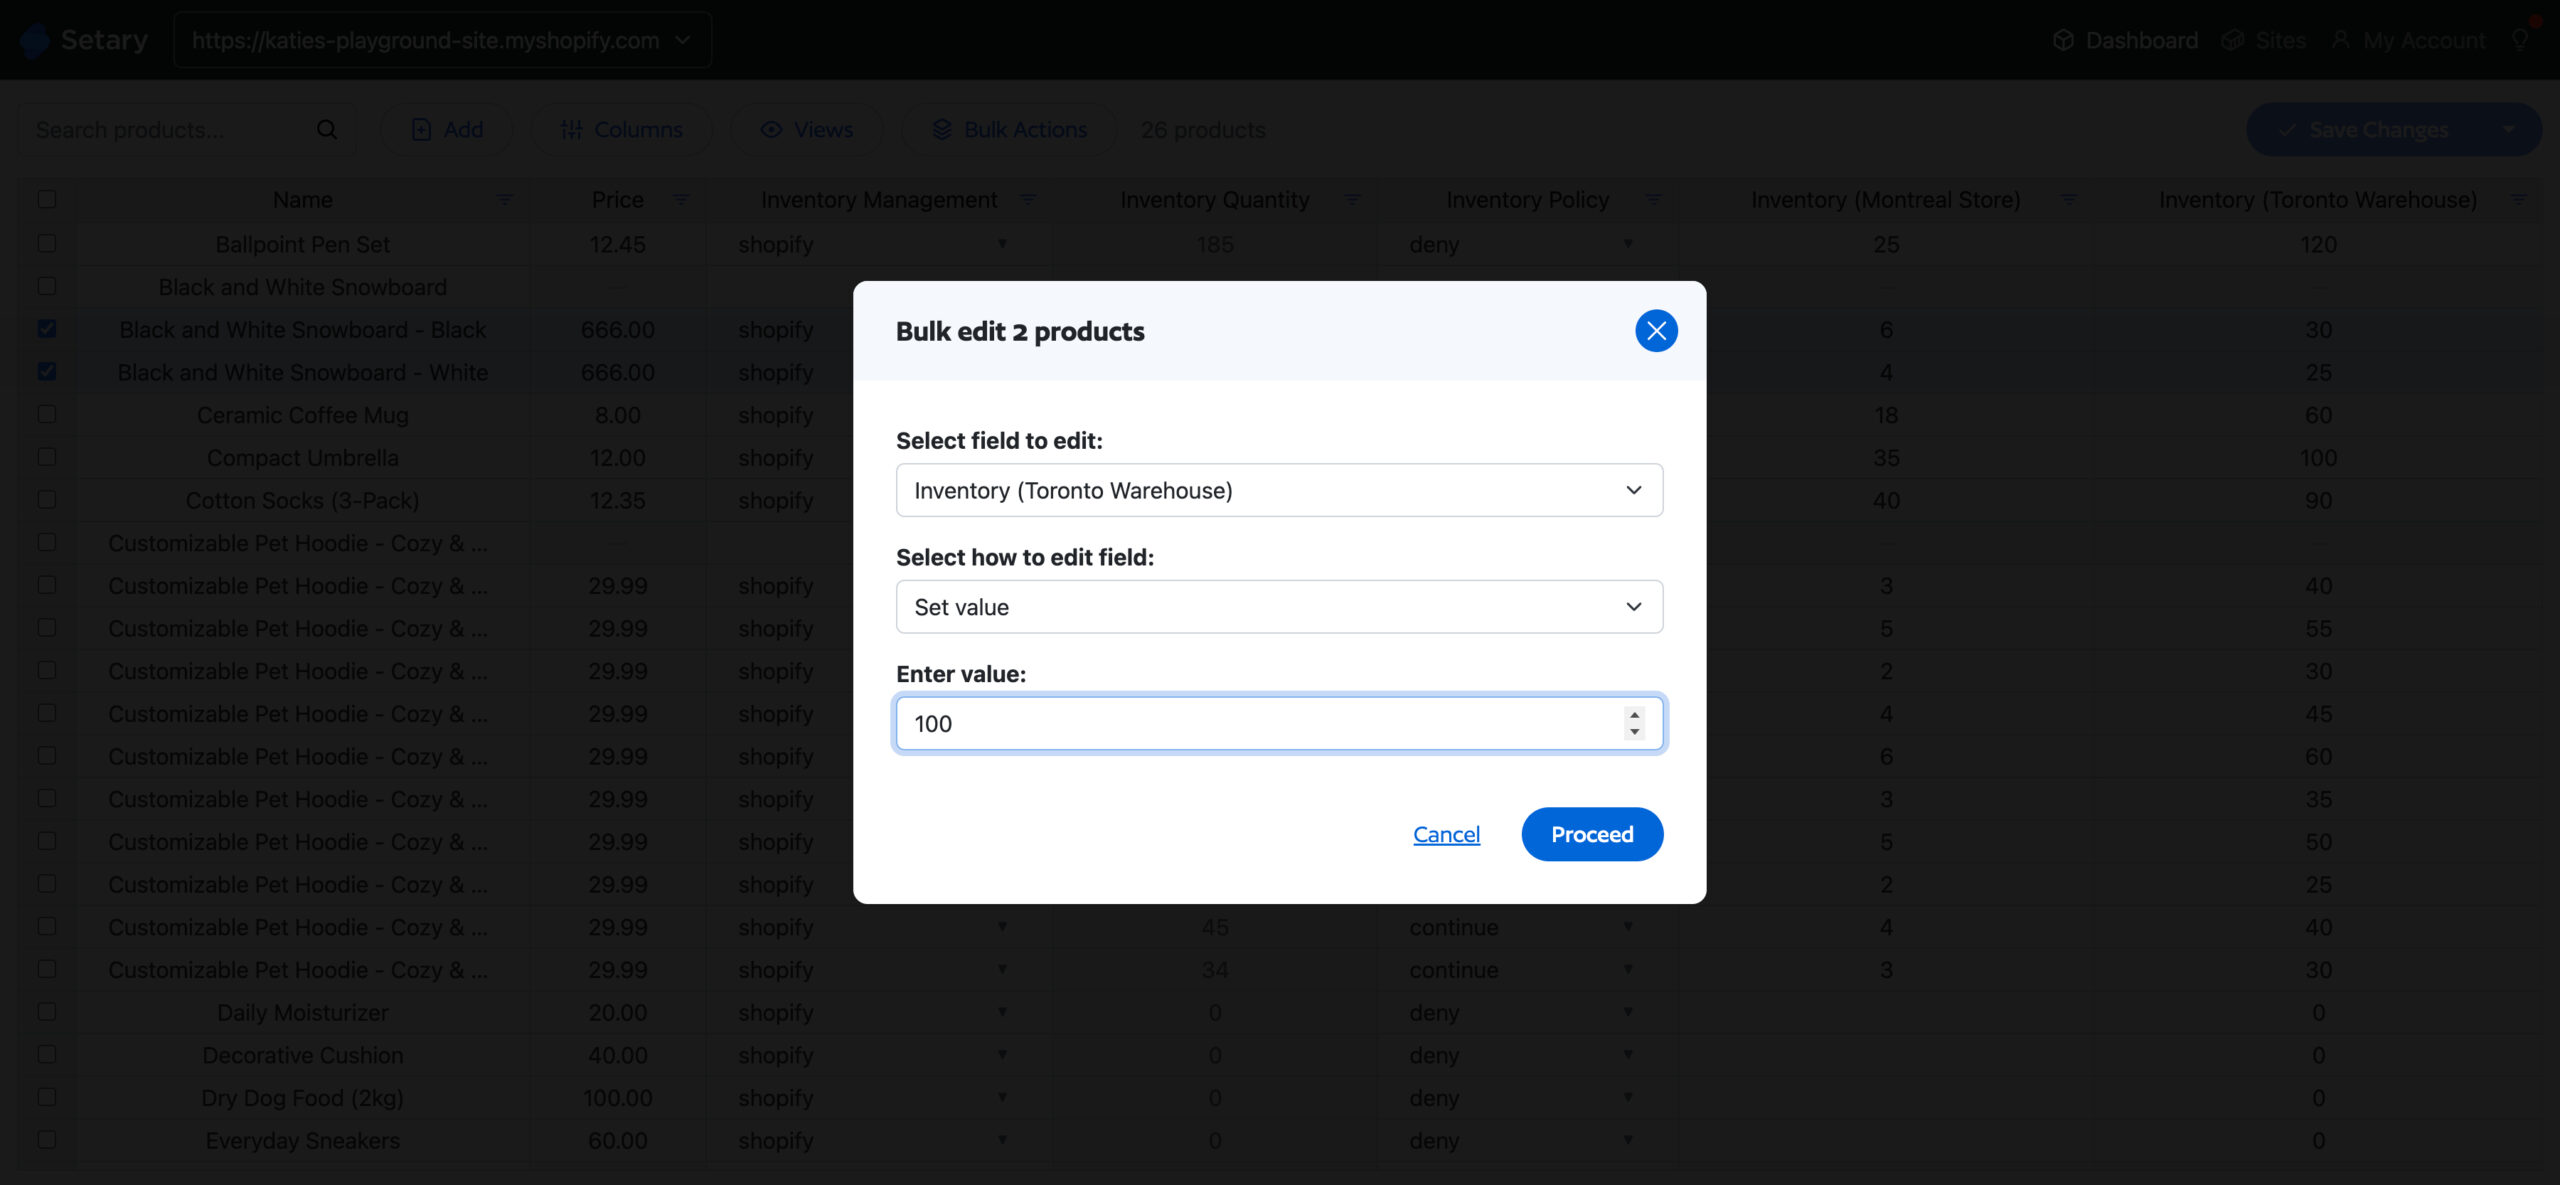
The bulk edit applies to the products you selected. If you selected all visible rows with the header checkbox, it applies to those visible rows after your search and filters.
Use a separate bulk edit for each location. For example, set Inventory (Toronto Warehouse) first, then repeat the action for Inventory (Vancouver Store) if that location needs a different quantity.
Filter Before You Edit
Filters control which rows appear in the spreadsheet. They are useful when you need to update stock for a smaller group of products, such as one vendor, product type, or collection.
Narrow the rows first, then select the products you want to edit. This helps you avoid applying a location quantity to products that should not change.
For filter instructions, see this guide: How to filter products in Setary.
For general stock editing, see: How to bulk edit stock in Setary.