
Changing a few hundred SKUs in Shopify one product at a time is a huge time-waster, and that is before you start on the barcodes. I’ll show you three faster ways to bulk edit SKUs in Shopify, and which to choose depending on the size of the change you’re making.
Most stores end up renumbering their SKUs at some point. For example, a new supplier might arrive with their own codes, or a stocktake might show that what is on the shelf stopped matching what is in Shopify months ago.
How you go about it depends on how many products are involved, and on whether the new numbers follow a rule you can apply in one go. In this post, I’m going to walk you through each way of doing it:
- Where Shopify Keeps Your SKUs
- Bulk Edit SKUs in the Shopify Admin
- Bulk Edit Shopify SKUs With a CSV Export and Import
- Bulk Edit SKUs and Barcodes in Setary
- Check for Duplicate SKUs Before You Sync
- Use the Same SKU Scheme Across Several Stores
- Loading Barcodes in Bulk
- Choosing the Best Way to Bulk Edit SKUs in Shopify
Where Shopify Keeps Your SKUs
Open a product with no options and you’ll find SKU and Barcode together under Inventory, on the product page itself. Open one with size or color options and those same two fields appear against each variant instead.
Both are the same field underneath. Shopify stores the SKU on a variant, and a product with no options still has a single default variant holding it. That is why the CSV export column is called Variant SKU even for your simplest products.
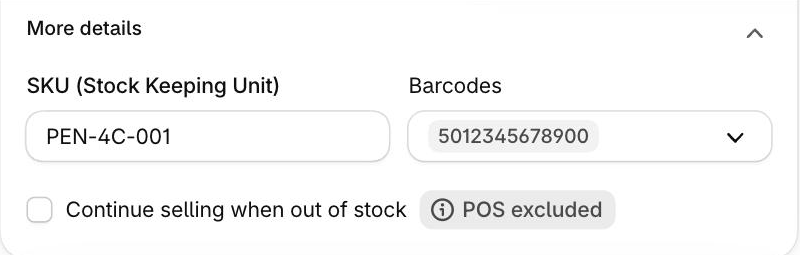
It also explains why your Products list has no SKU column to add, and why an import that only sets product-level fields leaves SKU and Barcode untouched.
One more thing worth knowing before you start: Shopify does not require SKUs at all. This is confirmed by its own documentation: “SKUs aren’t required, but consider using them for the following reasons.” The same page then says they must be unique. So Shopify treats a SKU as optional, but expects you to keep it distinct once you use one.
Bulk Edit SKUs in the Shopify Admin
Shopify’s built-in bulk editor is the right choice when you are changing a handful of products and you already know the new numbers.
Go to Products, tick the products you want to change, then click Bulk edit. Click Columns, add SKU, and add Barcode if you need it. Type the new values straight into the grid and save.
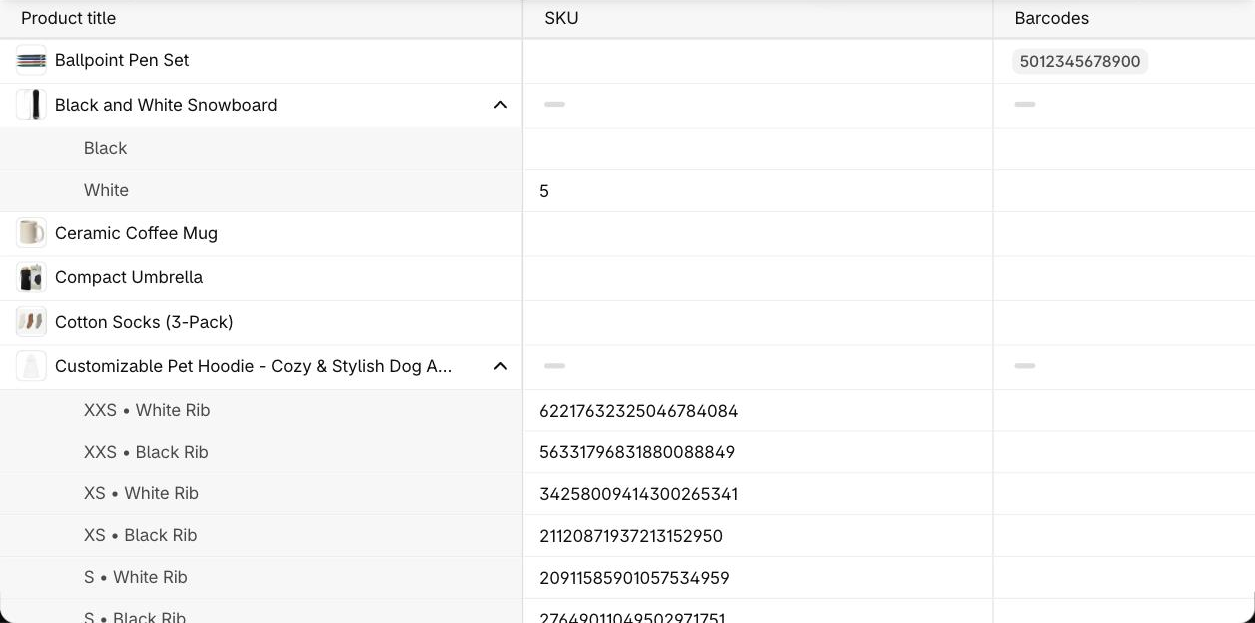
The bulk editor has no find and replace, so swapping a supplier prefix across 400 products means typing it 400 times. It also has no way to fill a value down a column, and you cannot see the old and new numbers side by side to check your work before it saves.
Bulk Edit Shopify SKUs With a CSV Export and Import
A CSV suits a change where the new SKU can be built from something you already have, such as a vendor name plus the old number.
Go to Products, click Export, choose Plain CSV file, and export your products. Open the file in Excel or Google Sheets and find the Variant SKU and Variant Barcode columns. Build the new values with a formula, then import the file back through Products and Import.
Watch the leading zeros. Excel and Google Sheets both strip them, so a SKU of 00451 becomes 451 the moment the file opens. Format the column as text before you touch anything. This bites harder on barcodes, which are all digits.
The other drawback is that you are re-importing your whole catalog to change one column, and you find out whether it worked by looking at your store afterwards.
Bulk Edit SKUs and Barcodes in Setary
Setary loads your Shopify products and variants into a live spreadsheet in your browser, so you can filter a large catalog down to the rows you care about and change them together.
Add the SKU and Barcode columns from the Columns menu. Filter down to the supplier or product type you are renumbering. Then open Bulk Actions and pick what you want to do to that column: Prepend Value to add a supplier prefix, Replace Value to swap one prefix for another, or Set Value to write the same code across every selected row.
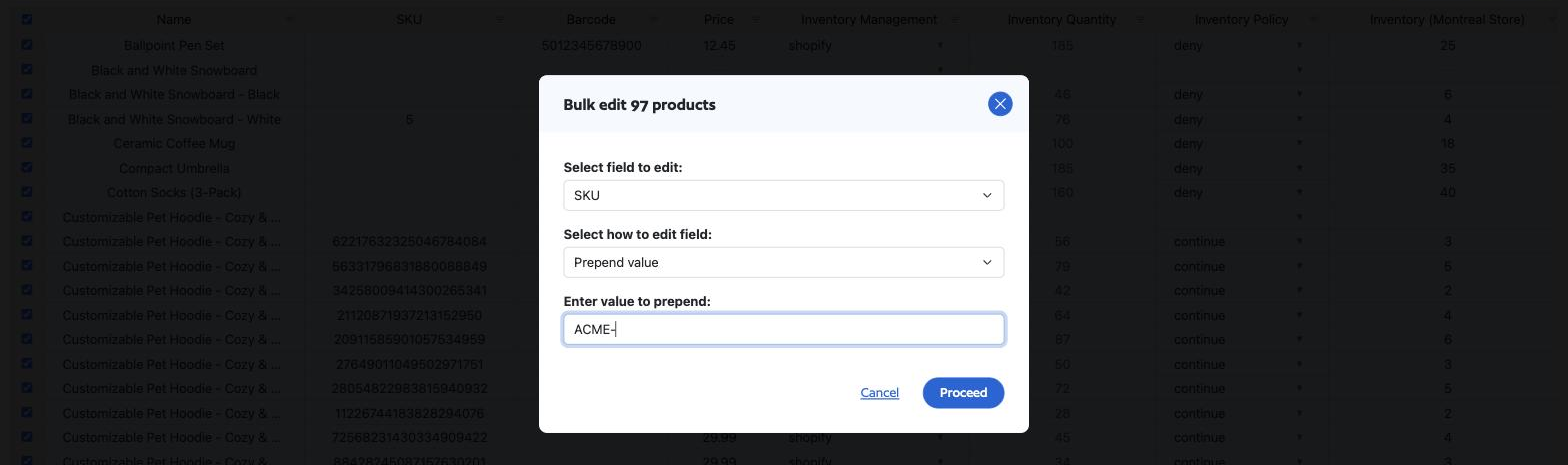
Setary stages the change in the sheet first. Your store is untouched until you click Update, so you can read the new numbers next to the old ones and walk away if they look wrong. You can preview and undo changes before you make them live, but there is no rollback once you sync your edits with your live store.
Setary also doesn’t store your product data. It reads your products live through the Shopify API and pushes your changes back once you have approved them, so there’s no copy of your catalog sitting on someone else’s server.
Setary costs $9.99 a month with a 7-day free trial. If you only need to change a few SKUs, don’t install anything, because the Shopify admin will be quicker.
Check for Duplicate SKUs Before You Sync
Shopify will warn you about a duplicate SKU, but it will still save it. Its documentation says a warning appears in the Inventory section of the affected product, and that merchants sometimes ignore it deliberately for bundles. The exception is Shopify Fulfillment Network, where unique SKUs are required for each variant.
The case that catches people is a prefix change on a filtered view. You filter to one supplier, apply a prefix to those 300 rows, and everything in front of you looks clean. It is clean within the filter. The new numbers can still collide with the 1,700 products you filtered out, and you won’t be able to tell because those rows are not on screen.
So run the check on the whole SKU column rather than on your selection. Clear the filter, or export the full column to a sheet and use COUNTIF to flag anything appearing twice. It takes half a minute and it saves you a huge amount of time on inventory support.
Use the Same SKU Scheme Across Several Stores
Some merchants run the same products from more than one Shopify store rather than using Shopify’s locations feature. If that is you, the numbering only helps when it matches everywhere.
Sign up to Setary for Shopify from each store you want to edit, then link them so they all appear in the stores drop-down at the top right. You can then apply the same renumbering to each store’s products from one place, rather than repeating the work in every admin.
Loading Barcodes in Bulk
A barcode holds a GTIN, UPC or EAN. The manufacturer issues it, or you buy a range from GS1. You copy a barcode from your supplier’s data, and you never make one up, because an invented barcode gets rejected by Google Merchant Center and by most marketplaces.
That changes how you edit barcodes in bulk. There is no rule to apply and no prefix to prepend. You are pasting a column of codes from your supplier next to the matching SKUs, which is why a spreadsheet suits barcodes better than a form does.
Check barcodes for duplicates too. A barcode belongs to one product worldwide, so two of your products sharing one means you have copied the wrong row.
Choosing the Best Way to Bulk Edit SKUs in Shopify
For a handful of products, the Shopify admin is the quickest route and you don’t need anything else.
For a change that follows a rule across a whole supplier, a CSV works well, as long as you are comfortable with formulas and you have formatted the SKU column as text first.
For anything larger, or where you want to see the new numbers before they reach your store, use Setary. Filter down to the rows you mean, apply the bulk action, read the staged values against the old ones, and sync when you are happy.
Bulk edit anything in WordPress, WooCommerce and Shopify
Try our demo now and discover how you could save thousands of hours managing your site.
or try the demo