
Most Shopify merchants need to export their data at some point. Sometimes it’s for accounting. Sometimes it’s to share a product list with a supplier, analyze customer spend in a spreadsheet, or give a colleague a snapshot of current inventory. Whatever the reason, Shopify has a built-in export tool that covers the basics for all three main data types: products, orders, and customers.
But there’s an important distinction worth understanding before you start. Exporting data for reporting is straightforward. Using an export to make bulk edits and push them back into Shopify is a different process entirely, and the native tool has real limitations there.
This guide walks through how to export each data type, what you’ll get, and when a dedicated spreadsheet editor like Setary for Shopify makes more sense than using Excel.
What “Export to Excel” Actually Means in Shopify
Shopify doesn’t export files in native Excel format (.xlsx). Instead it generates CSV files, which stands for comma-separated values.
CSV files open directly in any spreadsheet editor – including Microsoft Excel – and work the same way for most purposes. You can sort, filter, and edit the CSV in Excel, just like any other spreadsheet. The difference only matters if you need Excel-specific features like formulas tied to cell formatting or pivot tables that depend on .xlsx structure, which Shopify doesn’t support. For day-to-day reporting and analysis, CSV is perfectly fine.
How to Export Shopify Products to Excel
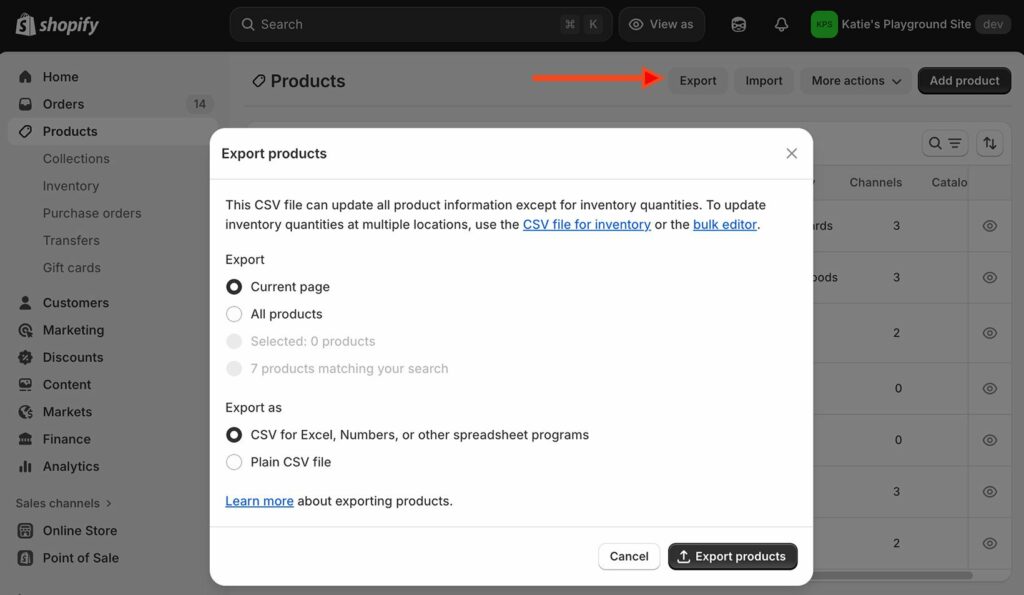
Go to Products in your Shopify admin. Click the Export button in the top right corner. Shopify then asks which products to include:
- All products in your store.
- Products currently visible on the page.
- A specific selection you’ve ticked manually.
Next, choose the export format. For most purposes, select CSV for Excel, Numbers, or other spreadsheet applications. For large catalogs, Shopify emails the file to your account address when it’s ready. For smaller stores, it downloads immediately. You can then download it to your computer and open it in Excel.
Tip: If your version of Excel won’t let you open a CSV file directly, then click File – Import and import the file instead.
If you’re exporting from Shopify to Excel in order to make product updates, then the final step is to re-import it. To do this:
- Export the modified Excel spreadsheet as a CSV file via File – Export and choose the CSV file type.
- Go to the main Products list in the Shopify admin and click the Import button.
What’s Included in a Shopify Product Export

The Excel file includes standard product fields: title, description, price, compare-at price, SKU, barcode, inventory quantity, weight, product type, vendor, tags, and variant data. Images are exported as URLs rather than image files, so the spreadsheet contains a link to each image rather than the image itself. Metafields aren’t included by default, though some can be added depending on your Shopify metafield configuration.
It’s a useful snapshot of your catalog. If you need to share a product list with a supplier or print a reference document for your team which they can open in Excel, the export does exactly what you need.
Limitations of the Native Product Export
Exporting Shopify data to Excel works well as a read-only record. However, it gets complicated when you try to use it for editing.
Editing product data in Excel and then re-importing a modified product CSV is error-prone. For example, column formatting has to be exact. Variants need to follow a specific row structure where each variant sits on its own row below the parent product, with most fields left blank. A single misplaced value or rogue line break can cause import errors across dozens of products. For stores with many products or variants, this becomes a significant time sink — and mistakes can go live before you spot them.
There’s also no undo in Shopify’s CSV import tool. If something goes wrong, you have to manually correct it product by product 🙀
If your goal is to bulk edit Shopify products rather than just download a list for Excel, the export route often creates more work than it saves. The good news is that there’s a better option, which I’ll tell you about next.
A Faster Approach for Managing Shopify Product Data: Setary
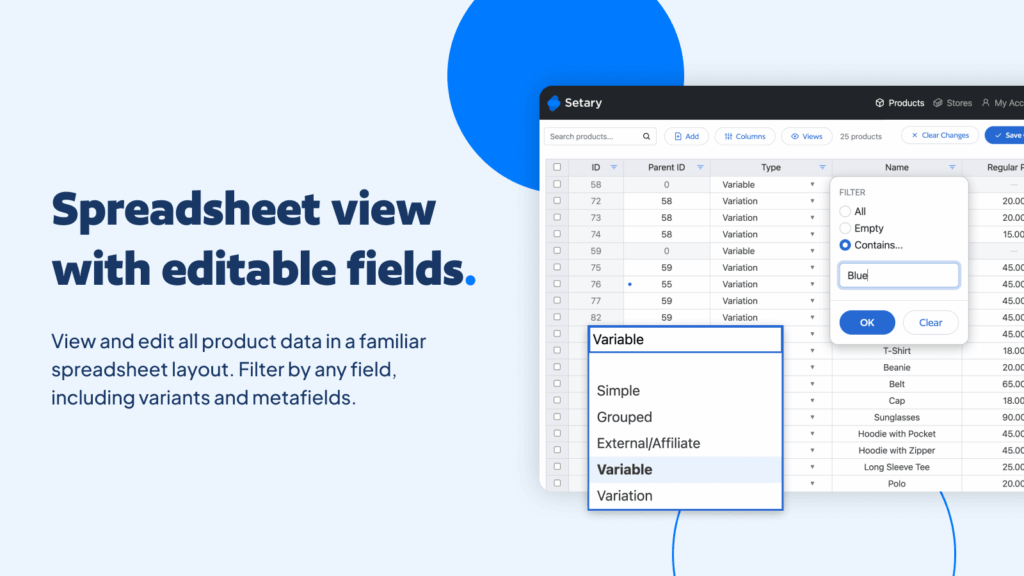
If you’re simply exporting products to Excel in order to analyze the data, then Shopify’s built-in export is ideal. However, it’s not a good solution if you want to edit the product data in Excel and re-import it to Shopify.
Setary connects directly to your Shopify store and gives you a live spreadsheet view of your entire product catalog. It’s similar to Excel, but is a purpose-built solution for bulk editing Shopify products. You edit prices, descriptions, inventory, variants, tags, and metafields all in the same interface. There’s no exporting, no importing, and no reformatting columns to match Shopify’s requirements. Changes sync back to Shopify immediately.
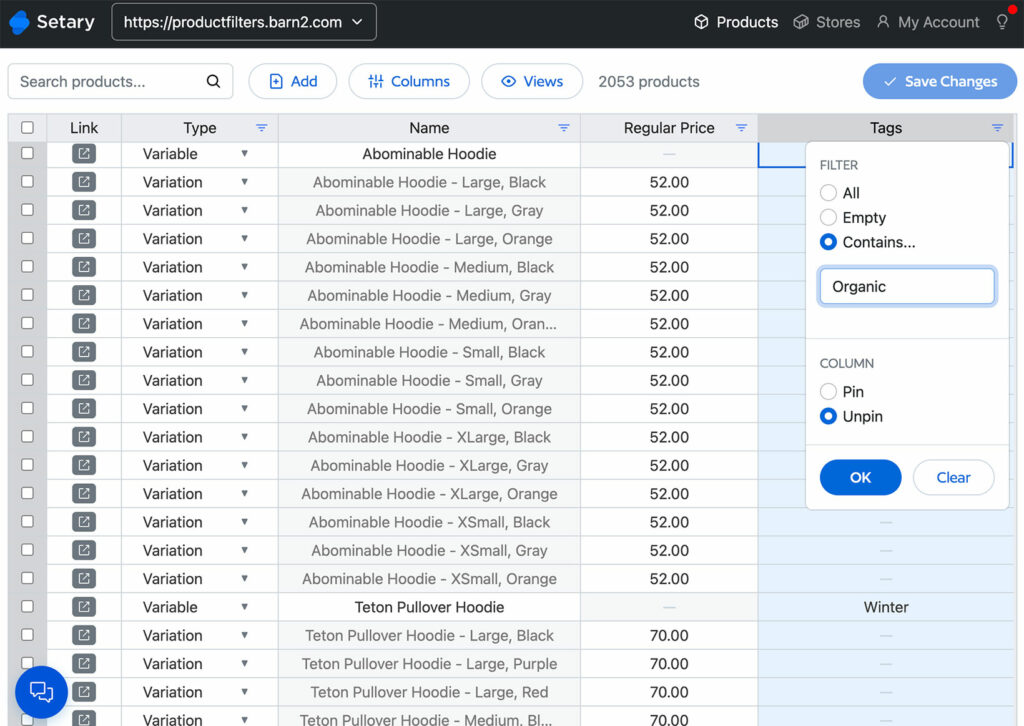
I find this especially useful for anything involving variant data. Shopify’s native bulk editor treats variant editing as a separate session from product-level editing, which makes bulk updates across a large catalog very slow. Setary displays products and their variants together in the same spreadsheet view, which cuts the time significantly.
The Setary workflow is also considerably safer. There’s no risk of accidentally overwriting data with a malformed CSV, no waiting for an import to complete, and no guessing whether the file formatted correctly until you check each product afterward. It just works and you don’t need to be an Excel expert to use it.
When to Use Setary vs. the Native Export
- Use the native export for one-off reporting, accounting, or sharing a read-only product list with a supplier or team member.
- Use Setary for regular price updates, bulk description edits, inventory management, variant data, tag updates, or metafields — anything where you’d otherwise be stuck in the export-edit-import cycle.
Setary offers a generous free trial, so you can test it with your actual Shopify products before committing.
How to Export Shopify Orders to Excel
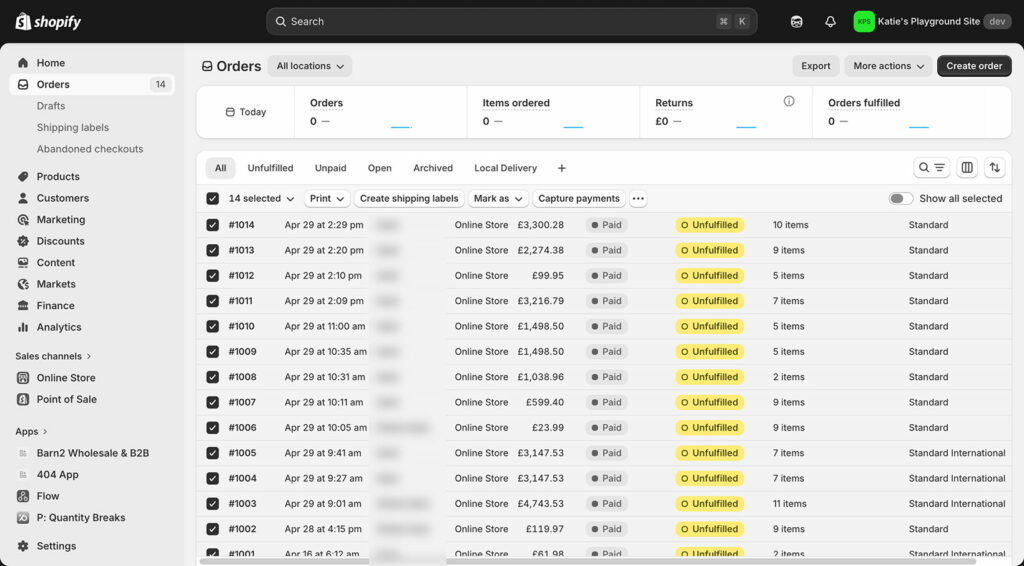
Go to Orders in the Shopify admin. Use the filters at the top to narrow by date range, payment status, fulfillment status, or sales channel before exporting. This saves you filtering in Excel afterward. Then click Export and choose from:
- Current page of orders.
- All orders matching your current filters.
- A specific date range you enter manually.
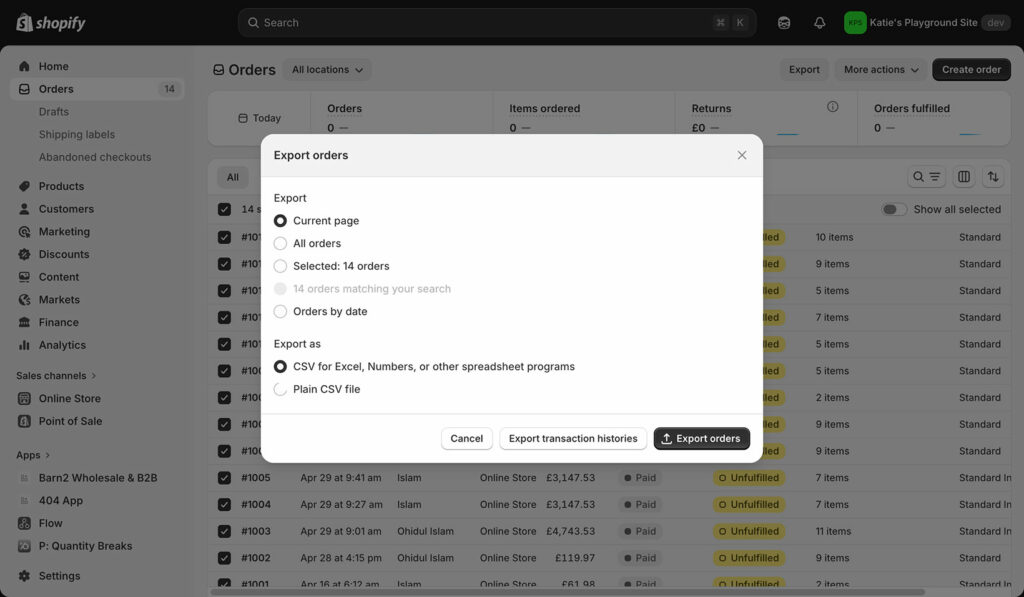
Shopify emails the CSV to your account address. For large order volumes, allow a few minutes for the file to arrive. Once you’ve downloaded it to your computer, open it in Excel.
What’s Included in a Shopify Order Export
An exported Excel file of Shopify orders is comprehensive. It includes order number, date, billing and shipping addresses, customer name and email, line item names, SKUs, quantities, unit prices, taxes, discounts, shipping cost, total order value, payment status, fulfillment status, and the sales channel the order came from. If you’re using Shopify POS or selling across multiple channels, then each order is also tagged with its source.
Exporting Shopify orders to Excel gives you a complete financial record of every transaction. Most accountants and bookkeepers are comfortable working with this format directly. They can also import it into whichever accounting system they use for your financial management.
Common Uses for Shopify Order Exports
The most common reasons that merchants export order data are reconciling revenue in accounting software, sending order details to a third-party logistics provider, and analyzing sales by product, region, or time period. It’s also useful for auditing discount usage or identifying which sales channel is driving the most revenue.
One important note: Shopify doesn’t support re-importing order data. The export is strictly one-way, which makes sense — order records are a financial audit trail and aren’t designed to be edited in bulk. The orders have to take place on Shopify itself – that’s what it’s for! Unlike products, there’s no reason to need a round-trip workflow for orders.
How to Export Shopify Customers to Excel
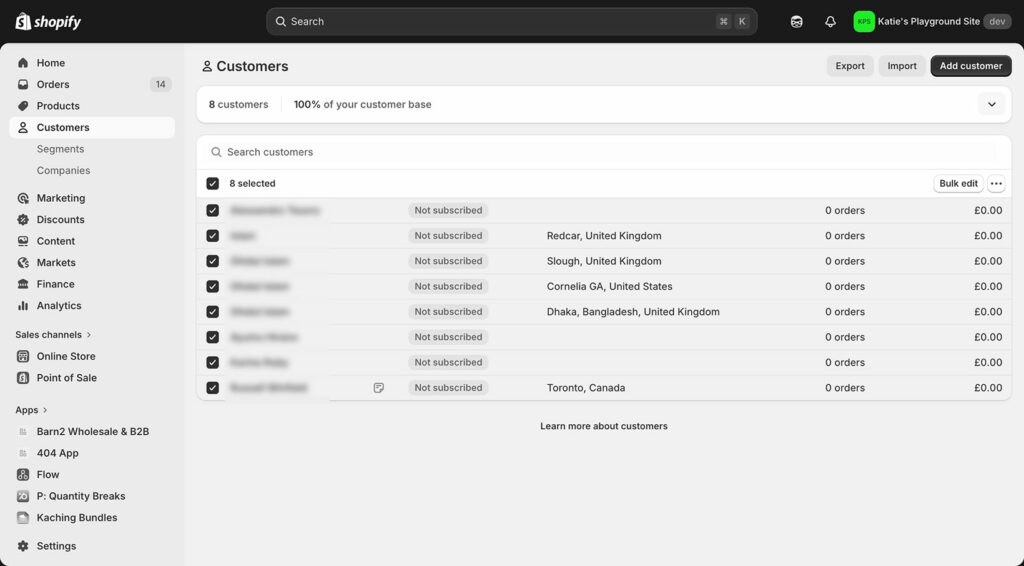
You might also want to export customer data from Shopify to Excel. For example, this is useful if you then plan to import it to your CRM or mailing list platform.
As with other exports, Shopify emails the CSV for larger lists and downloads it immediately for smaller ones. You can then open the Shopify customer export in Excel.
- Go to Customers in your Shopify admin.
- Use customer segments or the search and filter tools to narrow the list before exporting. Do this if you only need to export a specific group to Excel rather than your entire customer base.
- Click Export and choose either “Current segment”, “All customers”, or “Selected customers only”.
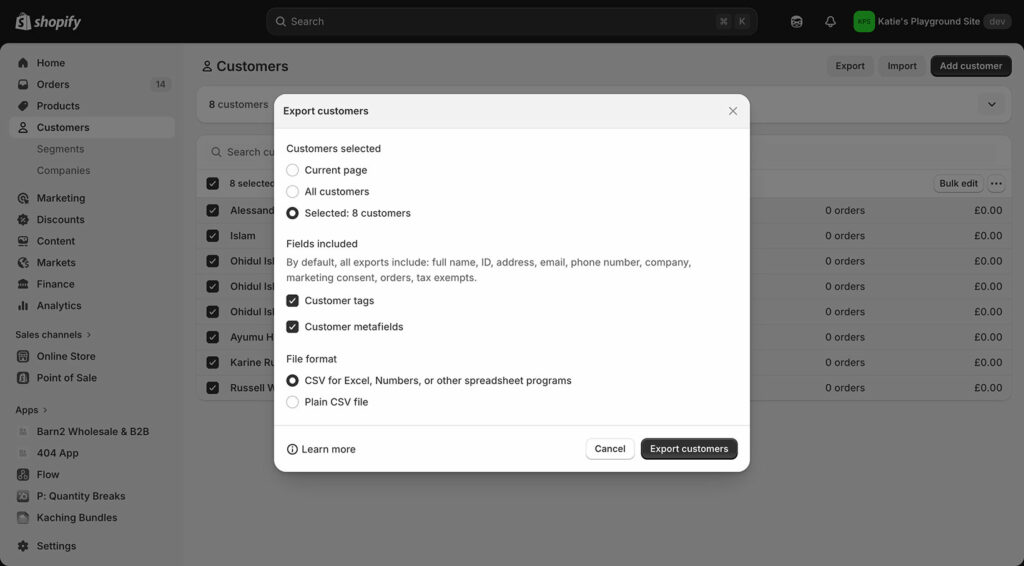
Tip: If you’re exporting customer data to Excel and storing it on your computer or company filing system, then ensure you meet all the relevant data protection legislation such as GDPR.As with orders, customer exports are primarily for analysis and outreach rather than editing. There’s no real equivalent of the product import problem here, since customer records are generally updated through Shopify itself rather than via bulk import.
Common Uses for Customer Exports
Customer data exports are most useful for importing contacts into an email marketing platform or CRM, building segmented lists for targeted campaigns, or sharing customer data with an agency running your email or paid social activity. The opt-in status field is particularly important — it lets you filter to only marketing-consented contacts before importing into your email tool.
However, if this is your reason for exporting customer data to Excel then I’d actually recommend syncing the data automatically via a Shopify connector app. That way, there’s no need to export to Excel at all!
What’s Included in a Shopify Customer Export
The Excel will will include the customer’s first name, last name, email, phone number, address, city, country, total orders placed, total spend, customer tags, and email marketing opt-in status. It also includes the date the customer account was created and the date of their last order.
Export from Shopify to Excel – the right way
Shopify’s export tool is straightforward and reliable for viewing orders and customers in Excel. For products, it works well as a read-only snapshot — but it’s not built for round-trip bulk editing.
If you were planning to export your product catalog, make changes in Excel, and then re-import back to Shopify, it’s worth trying a tool designed for that workflow. Setary for Shopify removes the export-import cycle entirely and gives you live spreadsheet-style control directly over your store. Sign up for a free trial today and see how much time it saves you.
Bulk edit anything in WordPress, WooCommerce and Shopify
Try our demo now and discover how you could save thousands of hours managing your site.
or try the demo