
Has this ever happened to you…? Shopify shows you a green “Import successful” banner. You check your store and discover that half your products are missing images, several variants have disappeared, and two descriptions have been wiped clean. The banner lied 🤥
The Shopify CSV import process is one of the platform’s most useful features for adding products in bulk – and also one of the easiest to get wrong. A single column header typo, a misplaced blank cell, or an incorrectly formatted Handle can silently corrupt an entire import without even displaying a clear error message.
This guide covers everything you need to get a Shopify CSV import right the first time. We’ll talk about the exact file requirements, how to structure variants and images, what causes imports to fail, and how to diagnose problems when they do. I’ll also tell you about Setary, which removes much of this complexity if you’re importing or managing products on an ongoing basis.
What Shopify’s CSV Import Actually Requires

A Shopify CSV import file is a comma-separated values spreadsheet that maps your product data to specific fields in Shopify. Each row represents a product or a variant. Each column maps to a field like Title, Handle, Price, or Inventory.
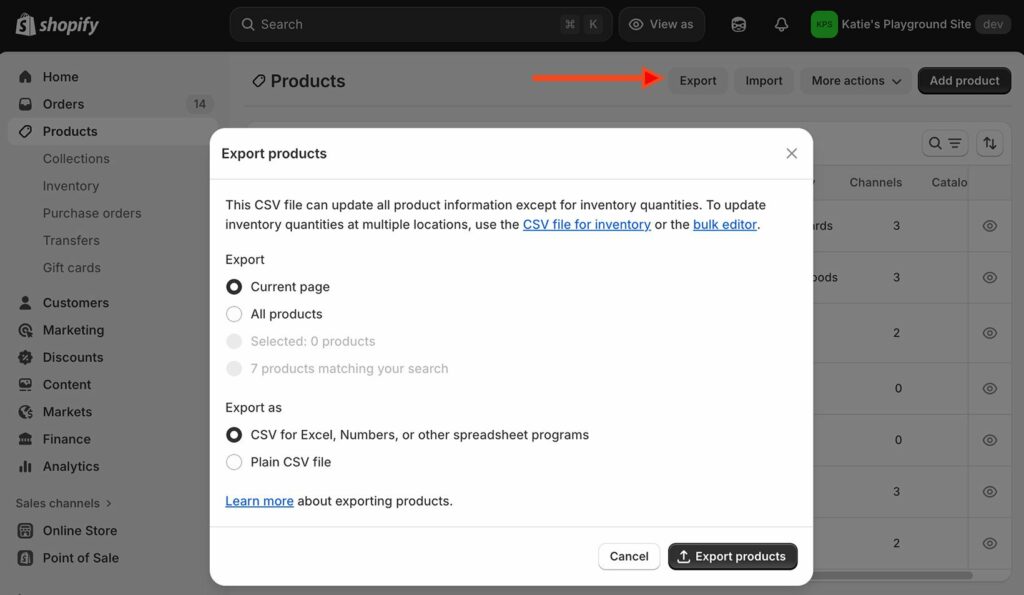
Before you start building your file from scratch, grab Shopify’s sample CSV template. Alternatively, go to Products → Export and download an export of your existing products. I find the most reliable approach is to create one product manually in Shopify first, then export it as a CSV. That gives you a working template that already matches your store’s exact column structure.
File Requirements
Your file must be UTF-8 encoded and under 15MB. This is surprisingly important because non-UTF-8 encoding garbles special characters across your entire catalog. Excel and Google Sheets don’t always save as UTF-8 by default, so check before you export.
Google Sheets always exports CSVs as UTF-8 automatically, so no action needed there. In Excel, choose “CSV UTF-8 (Comma delimited)” from the Save As file type dropdown – if you don’t see that option (older Excel versions), open the file in Google Sheets and export from there instead.
Column headers are case-sensitive. For example, “Option1 Name” is not the same as “option1 Name.” Shopify won’t flag this as an error – it will simply ignore the column and mess up your CSV import. For large imports, this is how you end up wondering why none of your variants came through.
When importing CSV to Shopify, which columns are required varies depending on what you’re doing:
- New products – Title is the only required column.
- Adding variants to existing products – Title and Handle are both required.
- Updating existing products – Title and Handle are both required.
The Handle Column
The Handle is your product’s unique identifier in Shopify. It also becomes part of the product URL. Use only lowercase letters, numbers, and hyphens. Avoid spaces, special characters, and starting handles with a number.
Every Handle must be unique across your catalog. Duplicate Handles cause CSV import failures, and Shopify’s error messages aren’t always clear about what went wrong.
Blank Columns vs. Omitted Columns
This distinction catches a lot of merchants off guard. If you include a column in your spreadsheet and leave any of the cells blank, the Shopify CSV import won’t just ignore them. Instead, it will actively erase the data if you’re doing an “Overwrite” import. To avoid this problem, delete the column that you’re not planning to edit. Alternatively, if you’re working with a CSV exported from Shopify, then leave the existing product data intact without deleting any values you still need.
Example: If you’re updating product titles and you include a Description column but leave it empty, Shopify will wipe your existing descriptions. Remove the Description column entirely to keep those values safe. This applies to any field you don’t intend to change.
How to Structure Variants and Images Correctly for your Shopify CSV import
Structuring Variants
When importing from CSV to Shopify, you can include product variables in the import. However, variants are where most Shopify CSV imports go wrong. That’s because the structure of variants in your CSV file is counterintuitive if you haven’t seen it before.
It works like this: Each variant gets its own row in the CSV. The first row for a variable product holds all the shared data: description, tags, product type, vendor, and so on. Subsequent variant rows share the same Handle and Title, but only need variant-specific fields filled in, such as Option values, SKU, Price, and Inventory.
For example, a t-shirt with two sizes and two colors needs four variant rows in total. All four share the same Handle. Row one might be “Small / Red” with its own image URL and SKU. Row two is “Small / Blue.” Row three is “Large / Red.” Row four is “Large / Blue.”
One critical warning: Do not rename option columns (for example, changing “Size” to “Dimension”) once variants exist. Renaming option names deletes all variant IDs. This silently breaks connections with third-party apps, subscriptions, and wishlists. Shopify will not show an error message. Similarly, if you include a variant column like SKU but leave out the Option1 Name and Option1 Value columns, Shopify may delete your existing variant structure.
For more on managing variants in bulk after your import, this guide to Shopify bulk variant editing covers the options in detail.
Structuring Images
The Image Src column requires a publicly accessible URL. Local file paths won’t work. Host your images on a server, CDN, or upload them to Shopify Files first to get a public URL. You can then copy this URL into the CSV spreadsheet prior to import.
To add multiple images per product, use one image URL per row. Each row shares the same Handle. The Image Position column controls display order: 1 is the main image, 2 is the second image, and so on.
Keep image URLs consistent and don’t sort your CSV in Excel or Numbers. Spreadsheet apps can corrupt image URLs and strip leading zeros from SKUs (turning “00342” into “342”) when you sort rows.
How to Run a Shopify CSV Import Without Data Loss
As you’ll have gathered from the previous section, there’s a lot to go wrong when you import product CSV’s to Shopify. And the consequences can be serious. The best way to avoid data loss is to avoid CSV’s together and manage product data using Setary’s bulk spreadsheet editor, which I’ll tell you about a minute. But before that, I’ll share my top tips on how to make the CSV process as safe as possible in case you still want to do that.
Test First, Import Second
Before you import your full catalog, create a test file. Copy your template and populate it with 5 to 10 rows of product data. Match the structure exactly. Run this through Shopify first. This catches formatting issues before they affect hundreds of products and mess up your catalog. I’m typing here.
The Import Process
Go to Products → Import → Add file and upload your test CSV. Review the preview screen carefully before proceeding. The preview shows you how Shopify has mapped your columns to product fields. Verify that everything looks correct here because once you click Import, you cannot cancel it. You can then click Import and wait for the confirmation email.
Choose whether to publish products immediately or keep them as drafts. For large imports, drafts give you time to audit before anything goes live. It’s a bit of work to test the drafts and then manually publish them, but can save major problems if something goes wrong.
Check the Confirmation Email — Not Just the Banner
The import banner says “successful” even when individual rows fail. The confirmation email is where you find the actual row-level errors. Check it immediately after every import. It contains links to specific failures and tells you exactly which rows had problems and why.
After a successful test, run a post-import audit:
- Check the admin panel and your live storefront.
- Verify that products are visible, images display correctly, stock counts are accurate, and variants match what you intended.
- Only once the test looks right should you scale up to larger batches. For large catalogs, split your file into batches of a few hundred rows. This makes it much easier to isolate and fix problems when something goes wrong.
Managing Inventory During and After Import
Merchants often use the CSV import process to bulk update inventory and stock levels. To do this, include initial inventory quantities in your product CSV on the first import. After that, switch to Shopify’s inventory CSV for all ongoing stock updates. The product CSV can accidentally reset inventory counts when you edit unrelated fields like titles or descriptions.
If you sell across multiple locations, put each location on its own row in the inventory CSV, with the location name specified. The Variant Inventory Policy column controls what happens when items go out of stock. Set it to “deny” to prevent overselling, or “continue” to allow backorders.
A general rule: Use the product CSV for product data, and the inventory CSV for stock.
Why Shopify CSV Imports Fail
There are nine common reasons a Shopify CSV import fails or causes unintended data loss:
- Column header typos. Headers are case-sensitive. One wrong character silently blocks the entire column from importing.
- Invalid or duplicate Handle values. Handles must be unique and can only contain lowercase letters, numbers, and hyphens.
- Blank columns erasing existing data. The difference between a blank column and an omitted column is not obvious, but the consequences are significant.
- Missing parent rows. Variant rows without a corresponding first row of base product data won’t import at all.
- Renamed option columns. Changing an option name deletes variant IDs with no warning and no undo.
- Non-UTF-8 encoding. Special characters display as garbled symbols across your catalog.
- Unescaped commas or quotes. Commas inside text fields break CSV parsing unless you wrap the text in double quotes.
- Excel or Numbers corrupting data. Sorting a CSV in a spreadsheet app can strip leading zeros from SKUs and break image URLs.
- The misleading success banner. Shopify confirms the import even when rows fail. Always check the confirmation email.
There is also no undo. Once a Shopify CSV import runs, you cannot cancel or roll it back. Mistakes require manual fixes, product by product. This is why it’s so important to import a test file with a small batch before you import your full catalog.
For a broader look at how CSV fits into bulk editing products in Shopify, including native tools and app-based alternatives, that guide covers each method in full.
A Faster (& safer) Alternative: Setary’s Spreadsheet Editor
CSV imports work well for a one-time catalog setup with clean, well-structured data. However, they have some serious problems:
- The data in the CSV has to be perfect, otherwise you risk huge data issues in your Shopify product data.
- The download-spreadsheet-upload cycle is time-consuming, especially if you make bulk product updates often.
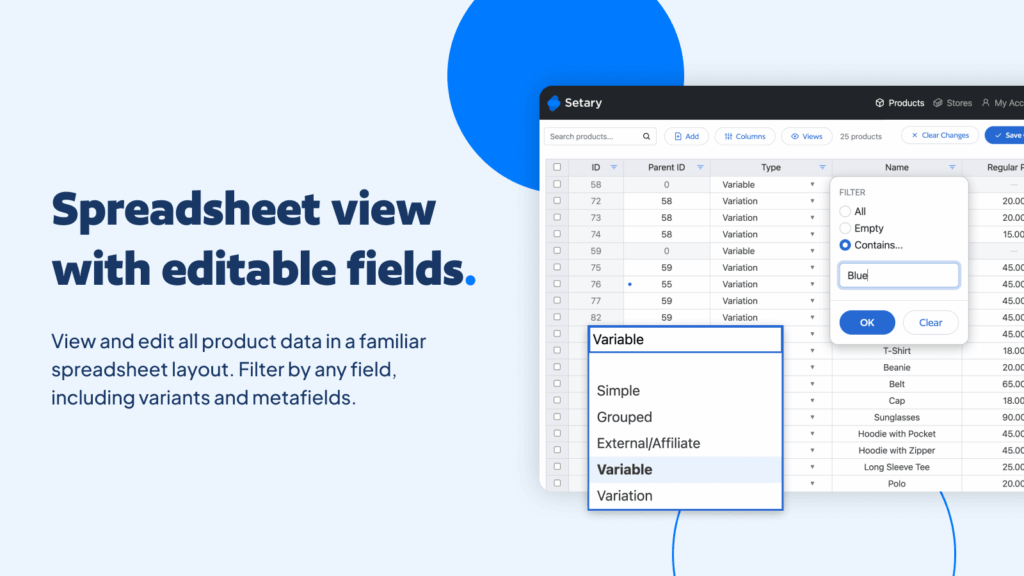
Setary fixes both problems. It’s a bulk editor which connects directly to your Shopify store and loads your catalog into a familiar spreadsheet grid. You can add, update, and manage products without ever preparing a CSV file, and without manually importing or exporting your products. Instead, you simply connect your store to Setary, make and preview your product updates, preview your changes, and hit “Save” ⚡️
3 Ways to Add and import products in Setary
Setary isn’t just about editing your existing product data. You can also use it to add and import products and variants. There are several easy ways to do this:
- Add a new row. Click ‘Add product’ to create a blank row. Fill in the Title, Handle, Price, Inventory, and any other columns you need. The product saves directly to Shopify once you publish. (To create a variant, use the same option and change the product type to “Variant”.)
- Duplicate an existing product. Find a similar product or variant in the grid, duplicate the row, and update only the fields that differ. This is especially useful for variants, where the base product structure is already correct and you just need to adjust a few values.
- Import from CSV. Setary has a built-in import option if you already have a CSV ready. The difference is that you can see and fix your data in the spreadsheet before anything goes live. There’s no guessing whether the import worked correctly.
If I needed to import 100’s of products or variants to Shopify, then I might consider using a CSV and previewing the changes in Setary before applying them to my live store. However, even in this scenario, I’d probably choose one of the first two methods. I hate working with CSVs and find it much simpler to quickly use Setary to filter for the products/variants I want to clone, duplicate the rows, and update the relevant columns.
What Setary Solves Compared to Native CSV Imports
Most of the most common CSV failures simply don’t exist in Setary:
- No invisible failures. Your data is visible in the spreadsheet before and after changes. You don’t wait for a confirmation email to find out what went wrong.
- No blank-column overwrites. You can see existing values while you edit. You won’t accidentally erase a description by leaving a column empty. If you want to keep the existing data, simply don’t delete it from the Setary spreadsheet!
- No fiddly spreadsheet controls. Spreadsheets are powerful tools, but can get really complex. For example, it can be difficult to filter an Excel file by multiple criteria in order to find the products you want to edit. Setary fixes this by providing a more user-friendly interface specifically designed for filtering, importing and updating products.
- Images without external hosting. Upload images directly in Setary instead of needing publicly accessible URLs or external CDN setup. It will store them natively in your Shopify store’s image bank.
- Fast bulk edits. While you can use complex commands to instantly update multiple products in a normal spreadsheet, this required advanced knowledge and isn’t for everyone. Instead, Setary lets you filter and select multiple products/variants and then apply instant bulk actions to them. This is much easier than making equivalent changes in a spreadsheet.
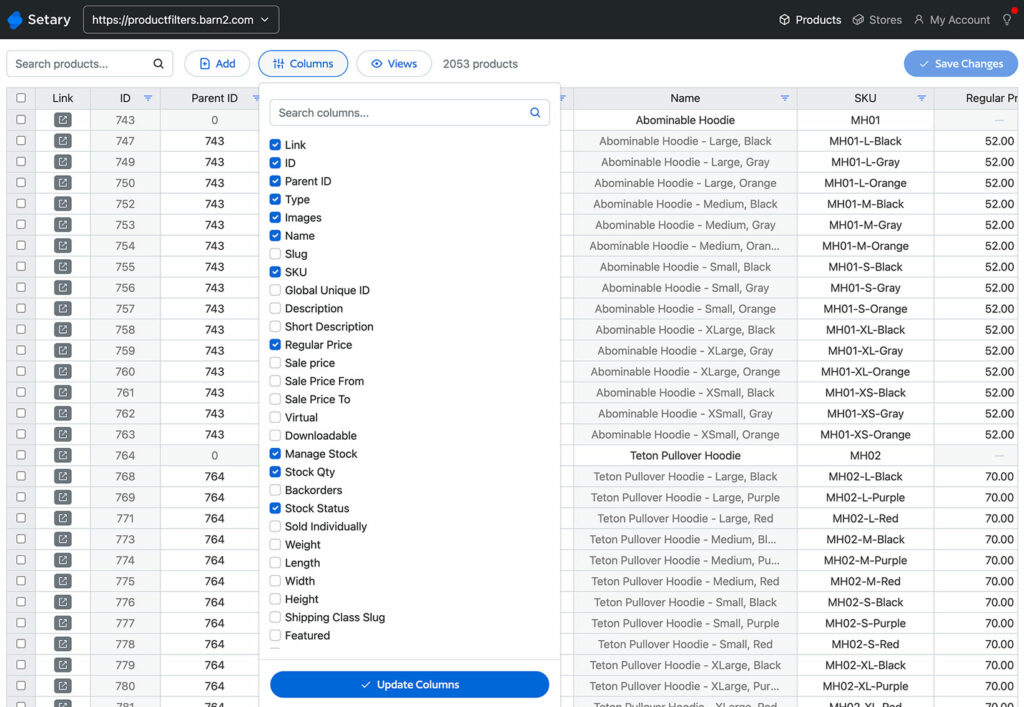
For ongoing tasks like bulk editing tags, updating prices across a category, or managing inventory, Setary lets you filter to the exact products you need, make changes inline, and publish when you’re ready. There’s also a one-click Undo button, which removes the nerve-wracking element of large bulk updates.
A free trial is available if you want to test Setary against your own catalog before committing.
Getting Your Shopify CSV Import Right
Adding or updating products by preparing and uploading a CSV is a valid way of importing items to Shopify. However, it’s rarely the best way. As well as being time-consuming, it’s incredibly error prone and high-risk.
For stores that update or import products regularly, Setary’s instant spreadsheet connection removes the formatting overhead and the risk of data loss on every import cycle.
Try Setary free and see whether a live spreadsheet approach fits your workflow better.
Bulk edit anything in WordPress, WooCommerce and Shopify
Try our demo now and discover how you could save thousands of hours managing your site.
or try the demo